Recently, I was given the honor of repairing a quilt made in 1941. I adore antique quilts, and having the chance to help bring this one back to life was an honor and an amazing experience.
It is a beautiful Sunbonnet Sue quilt with very detailed Sues appliqued and embroidered to a butter yellow background. The entire quilt was sewn by hand, and then quilted by hand. The blocks were quilted with diagonals, and the border quilted with a feathered swag and a cross-hatch pattern. The edge was finished with prairie points.
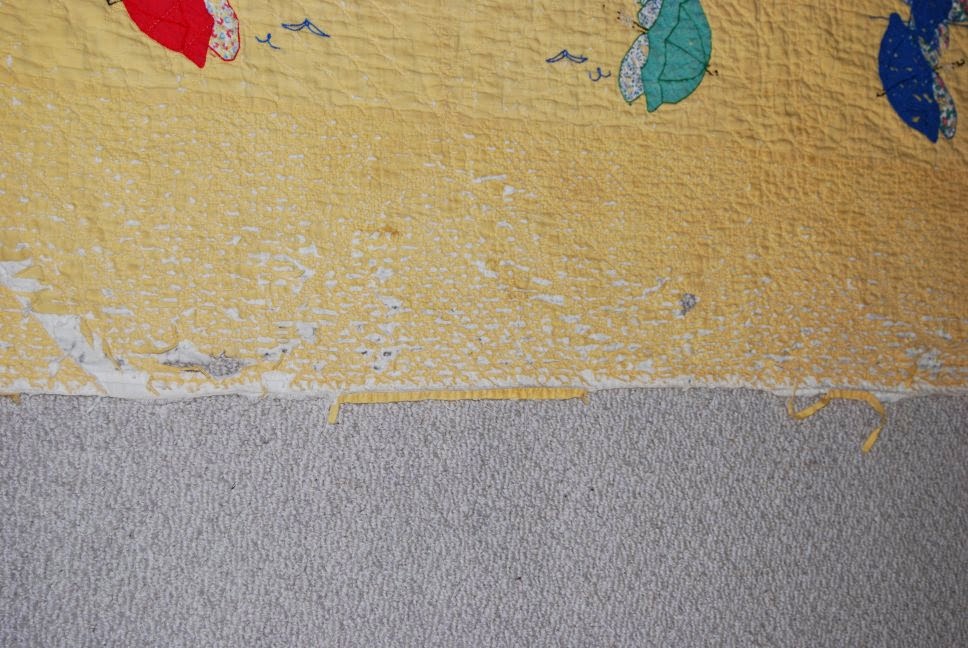
My client's relative (grandmother, I think?) made this quilt and it has been well loved over the years. It eventually went into storage, the relative passed away, and later a niece was born and named after the relative, so the decision was made to give the niece this quilt. They pulled it out of storage, to find it moth damaged, stained, and in need of some TLC.
This is the quilt, before I did any work on it:
It's lovely and I'm sure was simply stunning when it was brand new, but time has not been kind to it. The quilt had been washed to try and remove the stain, but it was not entirely successful. There is a hole in the quilt, to the right of the stain, between the purple and green Sues. The prairie points are disintegrating, and the fabric of the top border is fraying away.
Since my client just wanted the quilt stabilized and not completely repaired (which I don't think I could have done, to be honest), we focused on the two big things: The hole in the quilt and the fraying borders. I also recommended turning the quilt into a wall hanging, so that it could be viewed and enjoyed, but in a way that would be much safer for the quilt than actually being on a young girl's bed.
The first thing I did was to tackle the hole in the quilt. Here is a close-up image of the hole before I worked with it:
One good thing about this hole is it allowed me to see into the quilt, so I could see how it was constructed. Older quilts didn't always use batting in the center, sometimes old thin blankets known as sheet blankets were used. Sometimes a piece of flannel was used. I could see that this quilt did in fact use a very thin batting, so I dug through my batting scraps to find a suitably thin piece to use to patch the hole.
To get my batting piece the right shape, I first put a piece of paper under the quilt, so I could trace the shape of the hole onto the paper, and used that as a pattern to cut the batting piece. I then stitched it into place by hand using a big basting stitch.
Once the batting was secured, I made a template from clear template plastic to make an applique shape that I could sew on top of the hole. It needed to be big enough to completely cover the batting and basting stitches, and so that the edges of the applique piece were over good, solid fabric that would be able to take my stitches as I appliqued it in place.
The clear template plastic ensured that I could see the hole and the fabric around it so I could trace my applique shape adequately large. Then I cut out two applique pieces, one in yellow for the front of the quilt and one in white for the back (as the backing was muslin). With matching thread, I hand stitched the applique pieces both on the top and the back of the quilt.
After the applique pieces were both sewn on, I quilted over the patch, following the lines of quilting that already existed. Though the hand quilting was done with white thread, I was afraid that machine quilting with white thread would be too visible and look out of place, so I used matching thread instead. It helps the new quilting to blend in with the existing quilting.
Now that the hole has been repaired and the quilt has been stabilized, it is time to repair the borders. The easiest way to do this was to simply sew new fabric on top of the existing borders and quilt the new fabric to the quilt. I must admit, even though the borders were in bad shape, it almost killed me to cover up the beautiful hand quilting. At least it is still visible on the back of the quilt!
See what I mean? Beautiful!
But this was the state of the top border on the quilt, you can see how badly damaged it is. Something simply had to be done to repair the borders.
First things first, I had to trim off the prairie points. Then, using the same yellow fabric I used to patch the hole, I sewed new border fabric onto the quilt top, with the raw edge of the new border fabric following the seam line of the original borders. I used the same matching thread to do the quilting, making a straight line pattern that almost mimics the look of a piano key border. This quilting was easy to do and maintained the style decision of the maker to have the quilting of the borders differ from the quilting in the blocks.
Once the new borders had been completed, I added a basic binding around the whole quilt to finish it. I also added a hanging sleeve on the back of the quilt, using a piece of 1930's reproduction fabric from my stash that complimented the fabrics in the Sues' dresses on the quilt front.
Here is the repaired quilt:
My client was very happy with the quilt repairs, and I had a fantastic time doing what I could do help preserve this piece of quilting history.
What about you? Have you ever had an opportunity to repair or restore an antique quilt?