Saturday, February 8, 2014

Celtic Solstice: Finished!

 
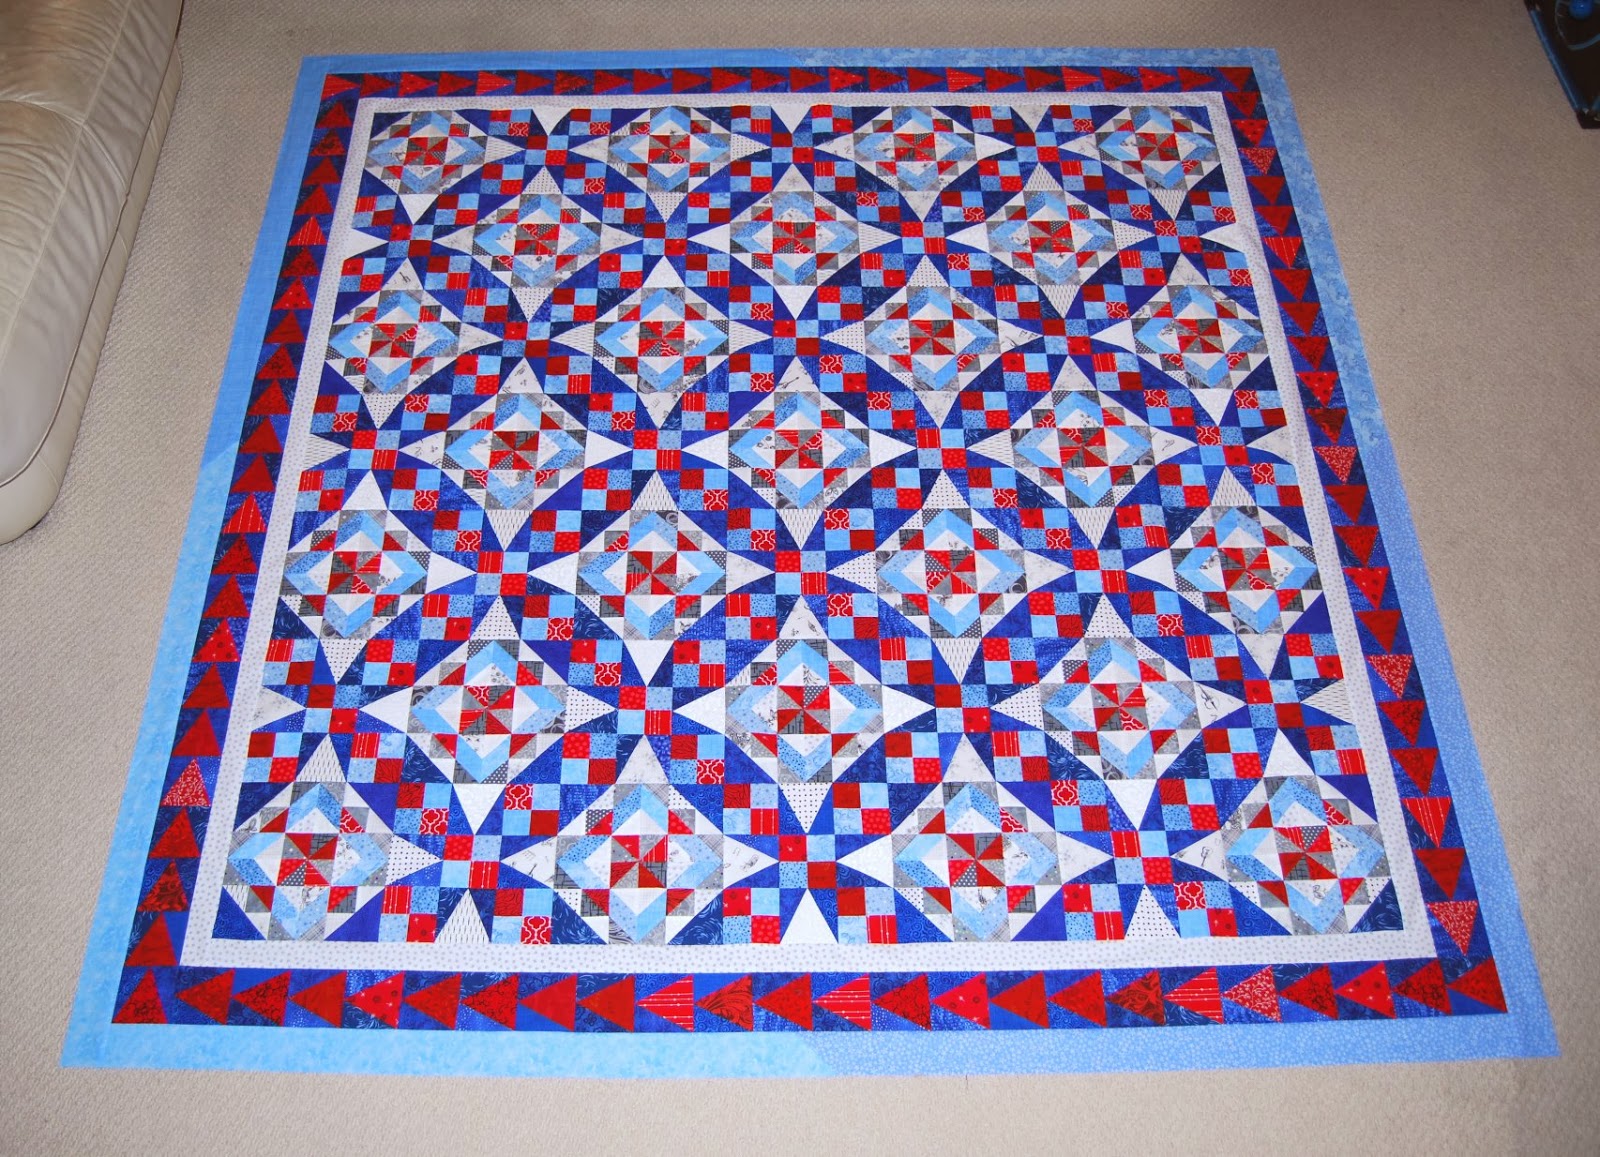
It's done!  My Celtic Solstice quilt is finally done!

I made the smaller version of the quilt, but it wasn't quite large enough for my needs so I extended it a bit.  I added the checkerboard border to the top and bottom of the quilt to lengthen it a little, and I also added a border all around the quilt, using a grey print that was too perfect to pass up.


I mean, look at that print!  It really mimics the effect that the pieced blocks in Bonnie's quilt achieve.  This wasn't exactly what I had in mind when I went looking for a border fabric, but it fits the bill perfectly and I'm glad I used it.


I quilted it with a simple meander, which will be fine for a bed quilt.  The meander gives the quilt texture without being too complicated, plus I didn't have a pantograph that really seemed to "go" with the quilt.  I used white thread for the quilting, I really had wanted a light blue but none of my blue threads looked right.  That's OK, the white worked just fine.


Thank you Bonnie, for once again writing and sharing a fantastic Mystery Quilt project.  You can see other folks' finished quilts at her last Link-Up of the project.

Sunday, February 2, 2014

My Little Labels

I have decided I'm going to try selling some homemade items at a Holiday Bazaar next year, which means the time to start making those items is NOW.  :)

I want my items to have a  professional look to them, so I decided I wanted some labels to sew onto my projects.  Not big huge tags, but little ones like you see sewn onto the hemlines of some shirts, or sticking out from the trim on a bag.  Then I came across a link on Pinterest that talked about exactly the kind of labels I was wanting.  That blog writer recommended this Etsy shop, where she had her labels made:

Worldwide Label

This shop is located in Hong Kong, and I guess they must deal with large volumes of label making because (to me) the communication was pretty slow.  I'd ask a question, and it might be 2-3 days (sometimes more) before getting a response.  Of course, I'm always on the computer and I'm very much a now.Now.NOW kind of person, so to me a response time longer than a day is "slow".  So take that into consideration LOL.  However, despite my impatience, they were very professional, answered my questions well, and the end result blew me away.

Finally, after much anticipation, my labels arrived!


Aren't they just too cute?  They turned out beautifully, exactly what I was wanting.  And they're the perfect little size to add on to my sewn projects.  Of course, I had to try them out as soon as I got them out of the box, so I made some rice-filled neck ice/heat packs and sewed a label into each one.


Here they are!  My first items with my tag sewn on.  How cute did they turn out?  Oh, I'm so excited!


I have 300 of these little labels to use up, so I'd better get cracking with making my items.  :)

Sunday, January 5, 2014

Making Celtic Solstice: Final Reveal


Bonnie surprised us by publishing the final clue of Celtic Solstice on New Year's Day!  It was definitely fun to see the final design and how all our units played together, but at the same time it was a sad day, knowing that we were done playing until next year.  Be that as it may, I got right to work on assembling my quilt.

First, we put together these blocks:


Next, we put together these blocks:


The blocks are set together so they alternate:


What a fantastic secondary design they create once they are put together!  I nearly fell over when I saw Bonnie's quilt all finished.  Of course, I had to lay out a few rows to see how the design would look in my colors:


Squeeeee!  Oh wow, I'm really loving this!

It took me 2 days to get the blocks assembled and the rows sewn together.  There I had to let this project sit while I got some work done on a project with a deadline.  But today was my play day, the day I save for MY projects, so I buckled down and finished my top:


Wowsa!  I really like the way this quilt has turned out!  This is as far as Bonnie's pattern took us.  However, I do have a plan to make the quilt bigger by adding a row of chevrons along the top and bottom, and then adding yet another border all the way around.


I may still do this, if I can find the right print for that outer most border.  I want to bring out more of the grey that is in the quilt, so if I can find a suitable print in grey with maybe some red and blue in it, that would be perfect.  I'm also rethinking the chevrons, I may instead make pinwheels or maybe 4-patches.  Do you have any thoughts on the matter?

Sunday, December 29, 2013

Making Celtic Solstice: Part 5

I can hardly believe we've finished Clue #5 of Bonnie's Celtic Solstice already, which means we've been working on this mystery for five weeks now.  How times flies when we're having fun!

This week we were making Split Triangle Units.  I'm making the smaller quilt, which meant that I needed to make 100 units.  Remember those "extra" or "leftover" HST units from Part 3?  They are being used in the making of these units.

I have a funny aside for you though.  When Bonnie said to use the "leftover" HST, somehow I got it in my mind that these were "bonus" HST that you get from trimming.  Oh no!  Did I miss a step?  Did I throw away scraps I should have kept?  Desperately I went back to view Clue #3... where I remembered that we had made those extra HST units and didn't turn them into pinwheels.  Whew!  Disaster averted!  It was definitely time for more coffee because I obviously wasn't completely awake yet LOL.

Here are all my pieces, cut out and laid out and ready to be sewn together... including those extra  HST:


Here's a block all laid out, to test out how the pieces will go together and how the colors will play with each other.  I think I'm going to like this unit!


Look!  All finished!  Yippee!


Of course, my curious engineer's mind has been trying to figure out how these units will go together.  Bonnie said that the small quilt will finish at about 75" x 75".  That could be divided up into 25 blocks set 5x5, with each block measuring 15".  Each block would use a total of 25 Clue Units set 5x5 (each unit finishes at 3", and 3" x 5 = 15").

We have 25 pinwheels from Clue #3, which could each be the center of a block.  We've made 100 Units in both Clue #2 and Clue #5, which can be divided up so each block gets 4 of each.  But my math falls apart when we get to Clue #1 (having made 92 and 96 Units in two colorways) and Clue #4 (having made 120 Units).

So really, this is me just saying that I have no idea how these units are going to be used and how the blocks will turn out.  What will come next week?  Will we make even more units?  Will we begin assembling blocks?  Only time will tell.  :)

Friday, December 20, 2013

Making Celtic Solstice: Part 4


Today Bonnie promised us an easy clue for Celtic Solstice... 4-patches!  When strip pieced, these little units go together super quickly.  Bonnie used orange and green for hers, but my color scheme is different.  I used red in place of orange, and light blue in place of green.

Here are my strips all cut out and ready to go:


I bought yardage in a few different prints in order to make this quilt.  I didn't have much in the way of scraps in the right colors, so this is what I call "planned scrappy"... where I have to buy a little of a few different fabrics to get the feel of a scrappy quilt LOL.

I'm working with 6 reds and 5 light blues at this point (though I used up one of them in this clue, I only have 4 left now).  Since I don't have many prints, I have to do what I can in order to get as many combinations of fabrics as possible, so it looks more scrappy.

To speed up piecing, I paired up all the strips of one blue and all the strips of one red together, and sewed them together.  Before pressing, I folded them in half (using the shorter of the two strips to measure this) and placed my ruler on top of the fold:


Then I used the heel of my hand to press down on the ruler, making a crease in the fabric:


Once the fabrics were creased, I removed the ruler and laid the strips flat.  Do you see the creases?


I lined up the creases of about 3 strip sets along one line on my cutting mat, then cut each strip in half along that crease.  This gave me twice as many strip sets to mix and match, which allowed me to get a greater variety of fabric combinations for my 4-patch units.

If you're behind on the clues, don't despair.  This clue really does go together quickly so it won't take much to get caught up.  Happy sewing!

Friday, December 13, 2013

Making Celtic Solstice: Part 3

Today Bonnie posted Clue 3 of her mystery, Celtic Solstice.  By Bonnie's standards, this was an easy clue...  For the small quilt we need to make "only" 200 HST (half-square triangle) units.  Half were turned into pinwheels while the other half are left as is, for use later in the process.

First, I had to cut out 200 pieces in each of my two colors.  Bonnie's pattern called for yellow and orange, but I'm using a different color scheme.  In place of yellow I'm using grey, and in place of orange I'm using red.  Here are my pieces, cut out and waiting to be sewn together:


I used the top rows of red and grey for the pinwheels, and the bottom rows of red and grey for the standalone HST units.

Here are the HST units made from the top rows, lined up and ready to be sewn into pinwheels.  Each column will combine into 5 pinwheels.


I don't have a ton of variety in greys at this point, I used up all the smaller scraps in the last Clue.  I've got yardage in 5 grey prints to work with from now on.

And here you go, all the pinwheels and other HST units, finished!


It's a strange feeling, to be done with a clue so quickly.  I guess this means I should work on my other projects while waiting for next Friday LOL.

Monday, December 9, 2013

Making Celtic Solstice: Part 2

Clue 2 of Celtic Solstice was posted:  We're making chevrons!  My color scheme is different from Bonnie's, I used light blue in place of her green, and grey in place of her yellow.  (You can see my entire color scheme earlier on my blog if you're interested.)

My fabrics, cut and ready to be sewn:

Do you notice that grey with the black texture in front of the right-most pile of grey squares?  I bought that specifically to use with Bonnie's last mystery, Easy Street. See below:


It's a good grey print, very versatile for a lot of different projects.  Since I have a lot left over, I thought it would be appropriate to use it in this mystery as well.  It fits right in with my color scheme!

Here you go, my chevrons all sewn up and ready to be put in their place in the quilt:


I am really liking this color scheme, the light blue with the grey.  I may have to plan another quilt in this color scheme, I like it so much.  At this rate, my list of "to do" quilts will never end LOL!